The Complete Guide To Wet Kit Installation

When it comes to semi-truck customization, installing a wet kit is a pivotal step toward enhancing functionality and versatility. These hydraulic systems empower trucks to tackle many tasks, from powering accessories to operating specialized equipment. However, wet kit installationrequires careful consideration and technical expertise. In this comprehensive guide, we’ll look at the intricacies of wet kit installations for semi-trucks from selecting the right equipment to executing the installation flawlessly.

Understanding Semi Wet Kits

Semi wet kits are indispensable tools for semi-truck owners to augment their vehicle’s capabilities. Whether powering hydraulic equipment for dump trailers or facilitating specialized tasks in construction and agriculture, the versatility of semi wet kits is unmatched. However, selecting the appropriate kit for your specific application is paramount. Consulting with the manufacturer or a certified PTO wet kit installer is essential for compatibility and optimal performance.

Key Considerations for Installing a Wet Kit on a Semi

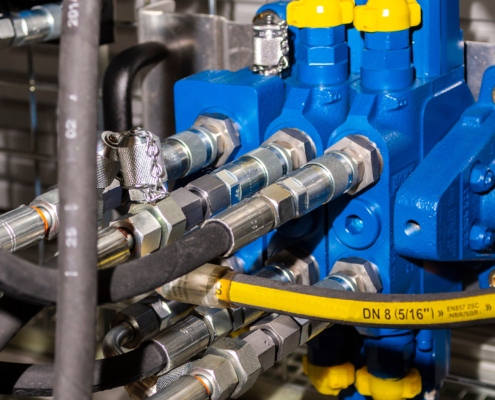
The installation of wet kits requires navigating hydraulic pump arrangements and valving systems, each designed to precisely control fluid flow. With numerous components and intricate mechanisms at play, wet kit installations demand an in-depth understanding of hydraulic systems. Entrusting the installation process to experienced providers ensures accuracy and reliability.

For those seeking insights into the installation process, we’ve compiled a comprehensive list of tips:

  1. Transmission Oil Check: Before starting the installation process, verify that the transmission oil levels are adequate for proper lubrication and hydraulic system performance.
  2. Ball Valve Safety Measure: Open the tank’s ball valve and securely tie it to prevent accidental closure during installation, minimizing the risk of fluid leaks or system damage.
  3. Pump Priming: Make sure the hydraulic pump is flooded with oil before installation to facilitate smooth operation and prevent air pockets within the system.
  4. Pump Rotation Correction: Verify the rotation of the hydraulic pump so it aligns with the desired direction of fluid flow, correcting any discrepancies as needed.
  5. Fitting Inspection: Thoroughly inspect each cap and plug in the system so all fittings are tightly secured to prevent leaks and maintain system integrity.
  6. Three-Line System Considerations: If you’re installing a three-line system, make sure the sleeve is correctly installed in the suction port to optimize hydraulic fluid flow and prevent air ingress.
  7. Hose Connection: Inspect hose connections to confirm they are leak-free and tightly secured, minimizing the risk of fluid loss and system malfunction.
  8. Optimal Fluid Level: Check that the hydraulic system is filled to approximately two-thirds of its capacity, allowing room for oil expansion due to heat and preventing overfilling.
  9. Bolt Torquing and Oil Management: Correctly torque all mounting bolts to secure components and remove any excess oil from the system for optimal fluid levels.
  10. Secure Hose Fastening: Use sturdy zip ties or brackets to secure hoses to the frame, preventing damage or interference during operation.
  11. Filter System Maintenance: For three-line systems, ensure proper filter flow, mount security, and leak-free filter connections to optimize filtration efficiency and prevent contamination.
  12. Airlines Routing: Route cab control airlines away from hot or sharp components to prevent damage and ensure safe operation.
  13. Leak Inspection: After completing the installation, start the wet line kit and inspect the system for any leaks or abnormalities, addressing them promptly for optimal performance.
Boost your semi fleet with White Tank’s expert wet kit installations.

Wet Kit Installation Costs

Wet kit installation costs vary significantly depending on several factors, including the type of kit, the complexity of the installation, and labor expenses. Semi wet kits are available in various sizes and configurations for different applications and budgets. Larger and more complex kits may have a higher price tag due to additional components and installation requirements.

Factors Influencing Pricing

  • Type of Wet Kit: The cost of a wet kit varies depending on its size, features, and brand. Basic kits offer standard functionality at a lower price, while premium kits with advanced features command a higher price point.
  • Installation Complexity: The complexity of the installation process significantly impacts overall costs. Factors like the type of truck, hydraulic system, and customizations can influence labor expenses.
  • Labor Expenses: Labor costs for wet kit installation vary depending on the technician’s expertise, geographic location, and duration of the installation process. Hiring experienced professionals may incur higher labor expenses, but ensures quality workmanship and reliable performance.
  • Additional Components: Additional components like hoses, fittings, and mounting hardware may be necessary depending on your requirements, adding to the overall cost of the installation.
  • Warranty and Support: Some wet kit manufacturers offer warranties and after-sales support, which can contribute to the overall cost but provide peace of mind and assurance of product quality.

Tips for Budgeting Effectively

  1. Research and Compare: Take the time to research different wet kits and compare pricing, features, and reviews from reputable sources. This will help you find the best value for your budget.
  2. Consider Long-Term Costs: While upfront costs are important, consider the long-term costs associated with maintenance, repairs, and upgrades. Investing in a quality wet kit with reliable performance and durability can save you money in the long run.
  3. Get Multiple Quotes: Obtain quotes from multiple wet kit installers or dealers to compare pricing and services. Be sure to ask about additional fees or charges to avoid surprises later.
  4. Factor in Installation Costs: When budgeting for a wet kit installation, don’t forget to include labor expenses. Consider hiring experienced professionals to make sure the job is done correctly and efficiently.
  5. Plan for Contingencies: Budgeting for contingencies is essential to account for unexpected expenses or complications that may arise during installation. Having a buffer in your budget mitigates financial stress and keeps the project on track.

Trust White Tank & Truck Repair for the Best Wet Kit Installations

Trust White Tank & Truck Repair for expert wet kit installations tailored to your semi-truck’s needs. Our certified technicians offer precise installation, optimizing your truck’s performance and versatility. Reach out to us today for unparalleled service and reliability.

More Like This